Overview
Miru natively supports the use of JSON Schema to validate configurations. However, you may find it simpler to validate configurations with your own software stack instead of relying on JSON Schema. To support this, Miru provides webhooks and server-side APIs. The setup involves two primary steps:- Deploy an endpoint that validates deployments for your application.
- Supply the endpoint’s URL to Miru and add Miru’s authentication to the endpoint.
- Miru sends deployment.validate webhook events to your endpoint whenever deployments require validation.
- Your endpoint sends validation results back to Miru using the validate deployment API.
Enable Custom Validation
Custom validation is enabled on a per-release basis. Enabling it on one release has no impact on other releases. To enable custom validation for a release, navigate to the Releases page. Click the ellipses on the far right of the release you would like to enable and select Edit from the dropdown.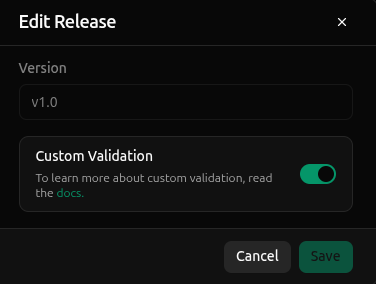
Enabling custom validation requires deployments to be validated. If you do not have a validation endpoint set up, deployments on this release will be unable to deploy.
Create an Endpoint
Next, you’ll need to supply the URL of the endpoint to Miru. If you haven’t deployed the endpoint yet, that’s okay. You can change the URL at any time, so feel free to follow along and deploy the endpoint later. Navigate to the webhooks page in Miru.
deployment.validate event.
We recommend using a route similar to /webhooks/miru, but you may use any route you prefer.
URLs should be of the form https://<your-domain>/<route>. For instance, if your domain is my-domain.com and you want to use the route /hooks/miru, your URL would be https://my-domain.com/hooks/miru.
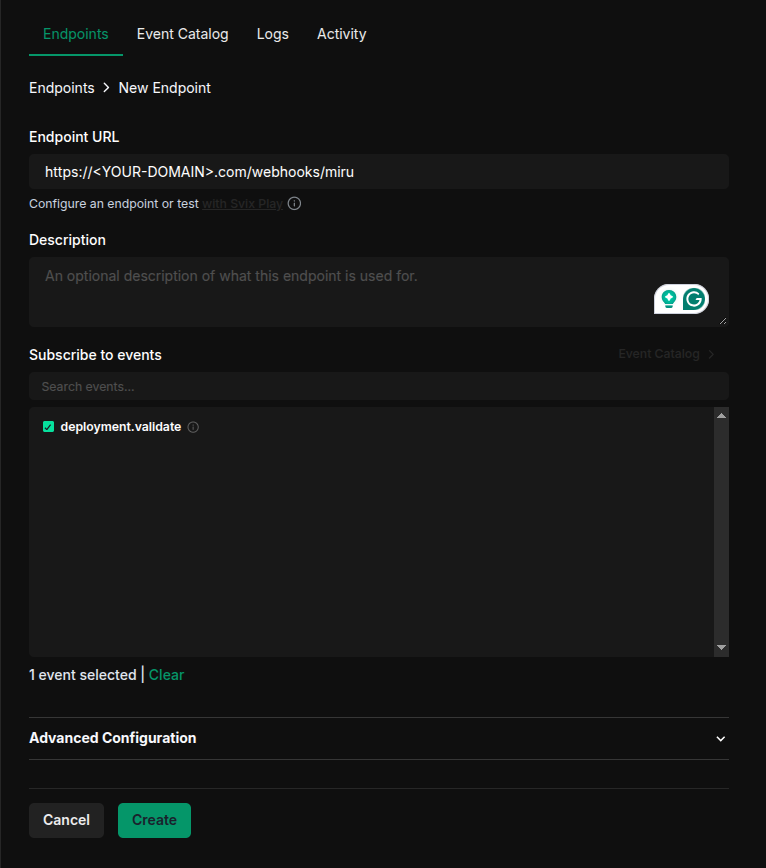
Your URL must use HTTPS. HTTP is not supported.
deployment.validate event, and click Create.
Secrets
You’ll need two secrets to integrate your endpoint with Miru: a webhook secret and an API key. Webhook secrets are used to verify the authenticity of the webhook request while API keys are used to authenticate requests to the Miru API. We recommend storing secrets in a secrets manager or other secure location. No matter where you choose to store them, be sure not to expose these secrets in publicly accessible areas such as GitHub, client-side code, and so forth.Webhook Secret
To retrieve the webhook secret for an endpoint, click into the endpoint. Then, click the eye icon on the far right of the page to reveal the secret.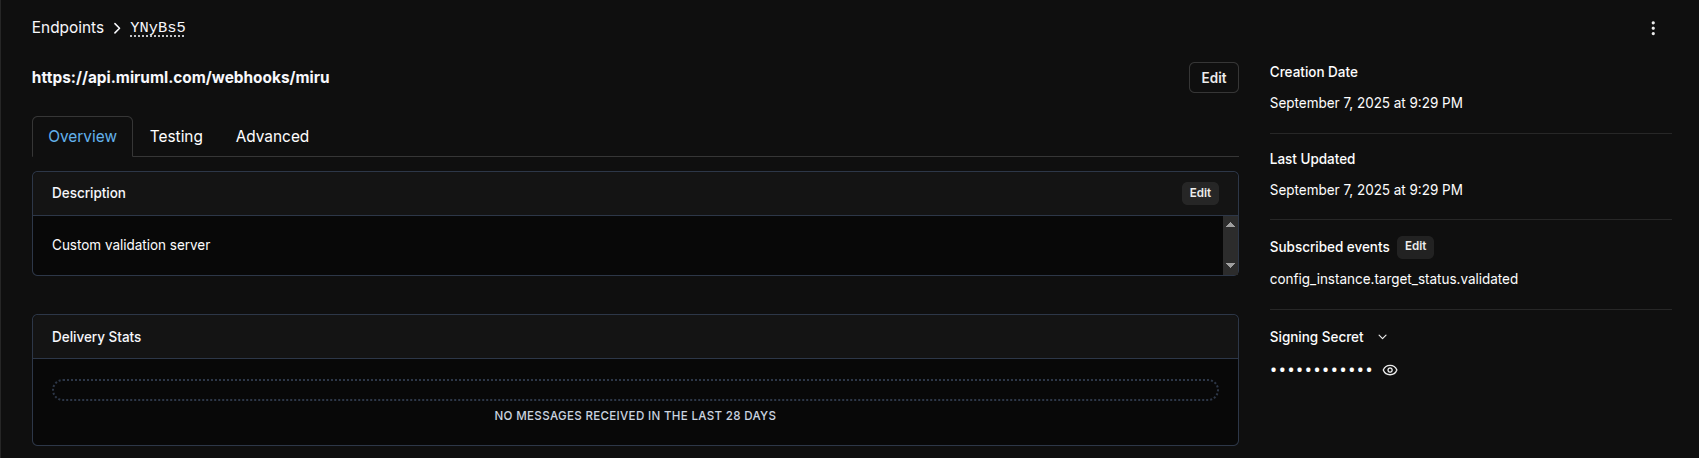
API Key
To create an API key for your endpoint:- Go to the API Keys page in the dashboard.
- Click New API Key.
- Provide a name, select the desired scopes, and click Create.
Once an API key has been created, it can never be retrieved again. If you lose your API key, you must create a new one.
Example Server
The custom-validation repository contains an example flask server that demonstrates webhook verification and deployment validation using the Miru server-side SDK.Secrets
For a plug-and-play experience with Webhook Secrets and API Keys, you may place the secrets in the .env file. However, for production use, we recommend storing the secrets in a secrets manager or other secure location.Code Walkthrough
The app.py file is the entry point for the flask server. Let’s walk through it step by step. The server accepts a POST request at the/webhooks/miru route. You may need to update this route to match the route you specified when creating the endpoint in Miru.
.env file or swapped out the get_env_var function for your secrets manager.
deployment.validate event, passing the event to the handle_validate_deployment function while ignoring all other events.
validate_deployment function. This is where you’ll add your own validation logic. The function takes config instances as arguments and returns the validation results.
Effects
The validate deployment API response contains aneffect field, which returns the effect of validating the deployment.
Depending on the validation results and the user’s intent, the deployment may be launched into one of several different states as a result. The effect field records what the deployment’s next state is, and the message field explains why.
In general, the validation endpoint does not concern itself with why the deployment needs to be validated or what action should come next. Miru handles these details for you.
However, the effect and message fields provide useful system transparency to understand what the system is doing and maintain some level of auditability.
Feel free to ignore the validation effect; although you may find it helpful to log validation effects for auditing and diagnostic purposes.
Reject
If your endpoint sets the is_valid field to be false in the validate deployment request, the deployment is ‘rejected’, and the effect field returns reject. Rejected deployments cannot be staged or deployed to devices but are maintained for historical reference. Error messages supplied in the request are displayed in the UI for convenience.
Stage and Deploy
If your endpoint sets the is_valid field to be true in the validate deployment request, the deployment is ‘approved’ and the effect field returns stage or deploy. Depending on the user’s original intent, the deployment may be staged for a future deployment or deployed immediately.
None and Void
In some cases, network latency or retries may cause the deployment to enter an invalid state. The effect field returns none or void in these exceptional cases to indicate the validation request was successfully received. However, the original intent of the user was not achieved due to errors unrelated to the validation endpoint.