Overview
Dashboard installation is the most straightforward method for installing the Miru Agent and is ideal for getting started quickly or managing individual devices. This method is particularly useful for initial setup, small deployments, development environments, or when you need the visual feedback and device management capabilities of the web dashboard. For automated deployments or provisioning multiple devices at scale, consider the API Key installation method.Create a Device
Navigate to the Devices page and click the New Device button in the top right corner.
Retrieve the Command
Click the Activate button on the device you just created.
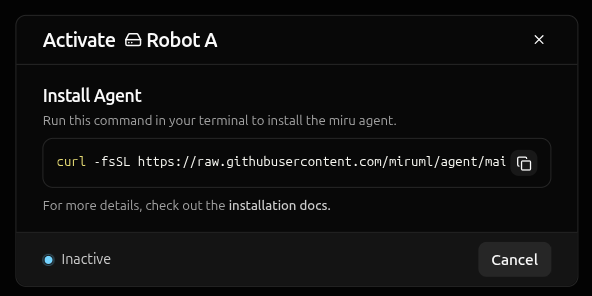
The activation token in this install command is short-lived and device-specific. Don’t share it or reuse it for other devices.
Run the Command
Open a terminal on the device where you want to install the Miru Agent and paste the installation command.Prerequisites:
curl must be installed and you need sudo privileges on the target device.curl -fsSL <installation-script-url>- downloads the installation script from the Miru Agent repository|- pipes the downloaded script to the shellenv MIRU_ACTIVATION_TOKEN=<activation-token>- sets the activation token environment variablesh- executes the script with the token
You can review the installation script source code here before running it.
- Downloads the agent - fetches the latest Miru Agent debian package
- Installs the service - installs the agent as a
systemdservice - Activates the device - registers the agent with Miru servers using the activation token
Verify the Installation
Upon successful installation, you’ll see a confirmation message in the terminal.Activating before transitioning to Online.
The transition from
Activating to Online typically takes 5-15 seconds depending on your network connection.