December 19, 2025
Workspace Logo
You can now personalize your workspace with a team logo and add a profile picture to your account. We’ve also added a new feedback form in the app so you can easily share your thoughts or report bugs.Upload a workspace logo
Admins and owners can now upload a custom logo for their workspace. Once set, the logo is displayed in the sidebar and invite pages, giving new members a branded welcome experience.Upload a profile picture
Make your profile your own. Go to Settings → Profile to upload a profile picture. We’ve included a built-in cropper so you can center your image perfectly before saving.Give feedback in the app
We’ve added a dedicated feedback button directly in the sidebar so you can share your thoughts without leaving your workflow.Use the feedback form to share:- Feedback — feature requests, suggestions, or general thoughts
- Bug Report — issues you encounter while using the app
- All reported bugs are resolved within 7 days
- Critical bugs are resolved within 2 days
December 4, 2025
CUE Support
We are excited to announce full support for CUE (Configure, Unify, Execute) as a first-class schema language in Miru. You can now define config schemas in CUE, version them in Git, and push them via the Miru CLI to validate config instances before deployment.Uploading a CUE schema
Pushing a CUE schema to Miru follows the same Git-integrated workflow you are used to. Simply define your schema in a.cue file and use the Miru CLI to push it.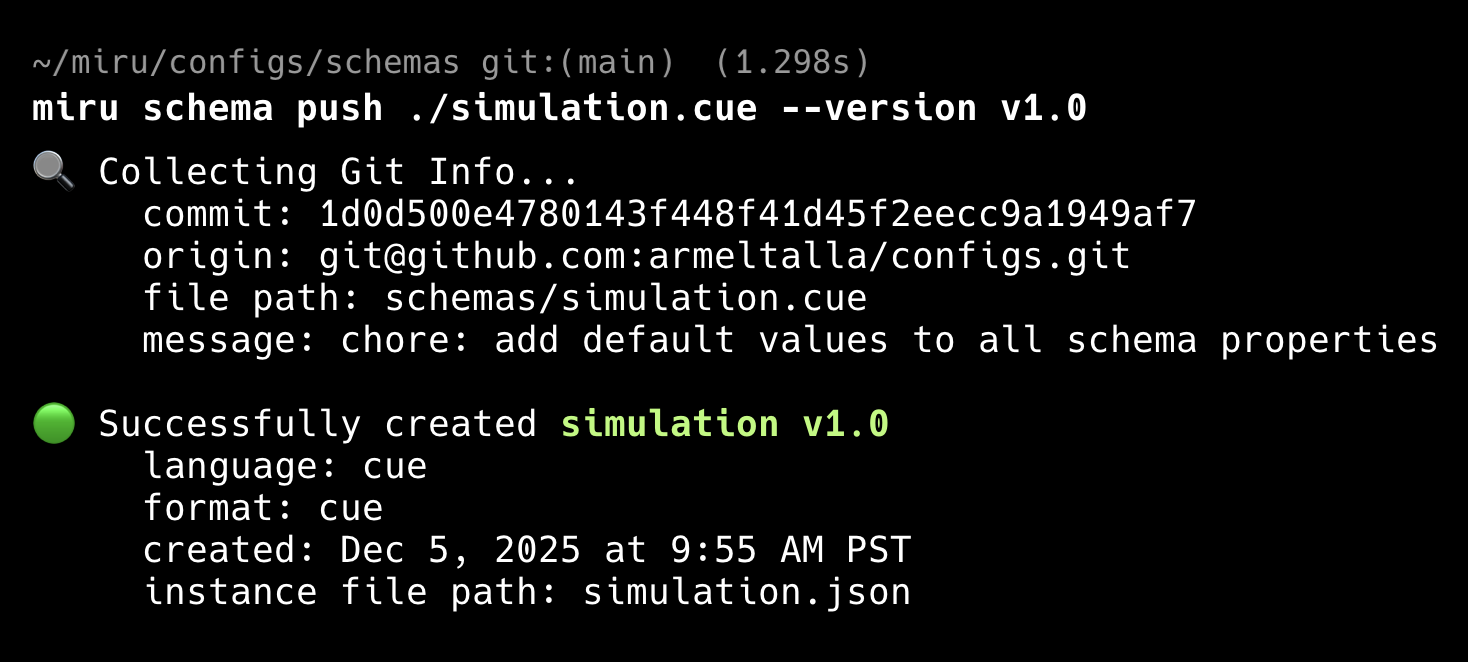
Managing CUE schemas
Once uploaded, your CUE schemas appear in the dashboard where you can view the raw content (preserving comments and formatting) and associated metadata.Management works just like existing schemas: most properties are immutable, though you can update the config instance deployment path. Deletion is only permitted for schemas with no active config instances.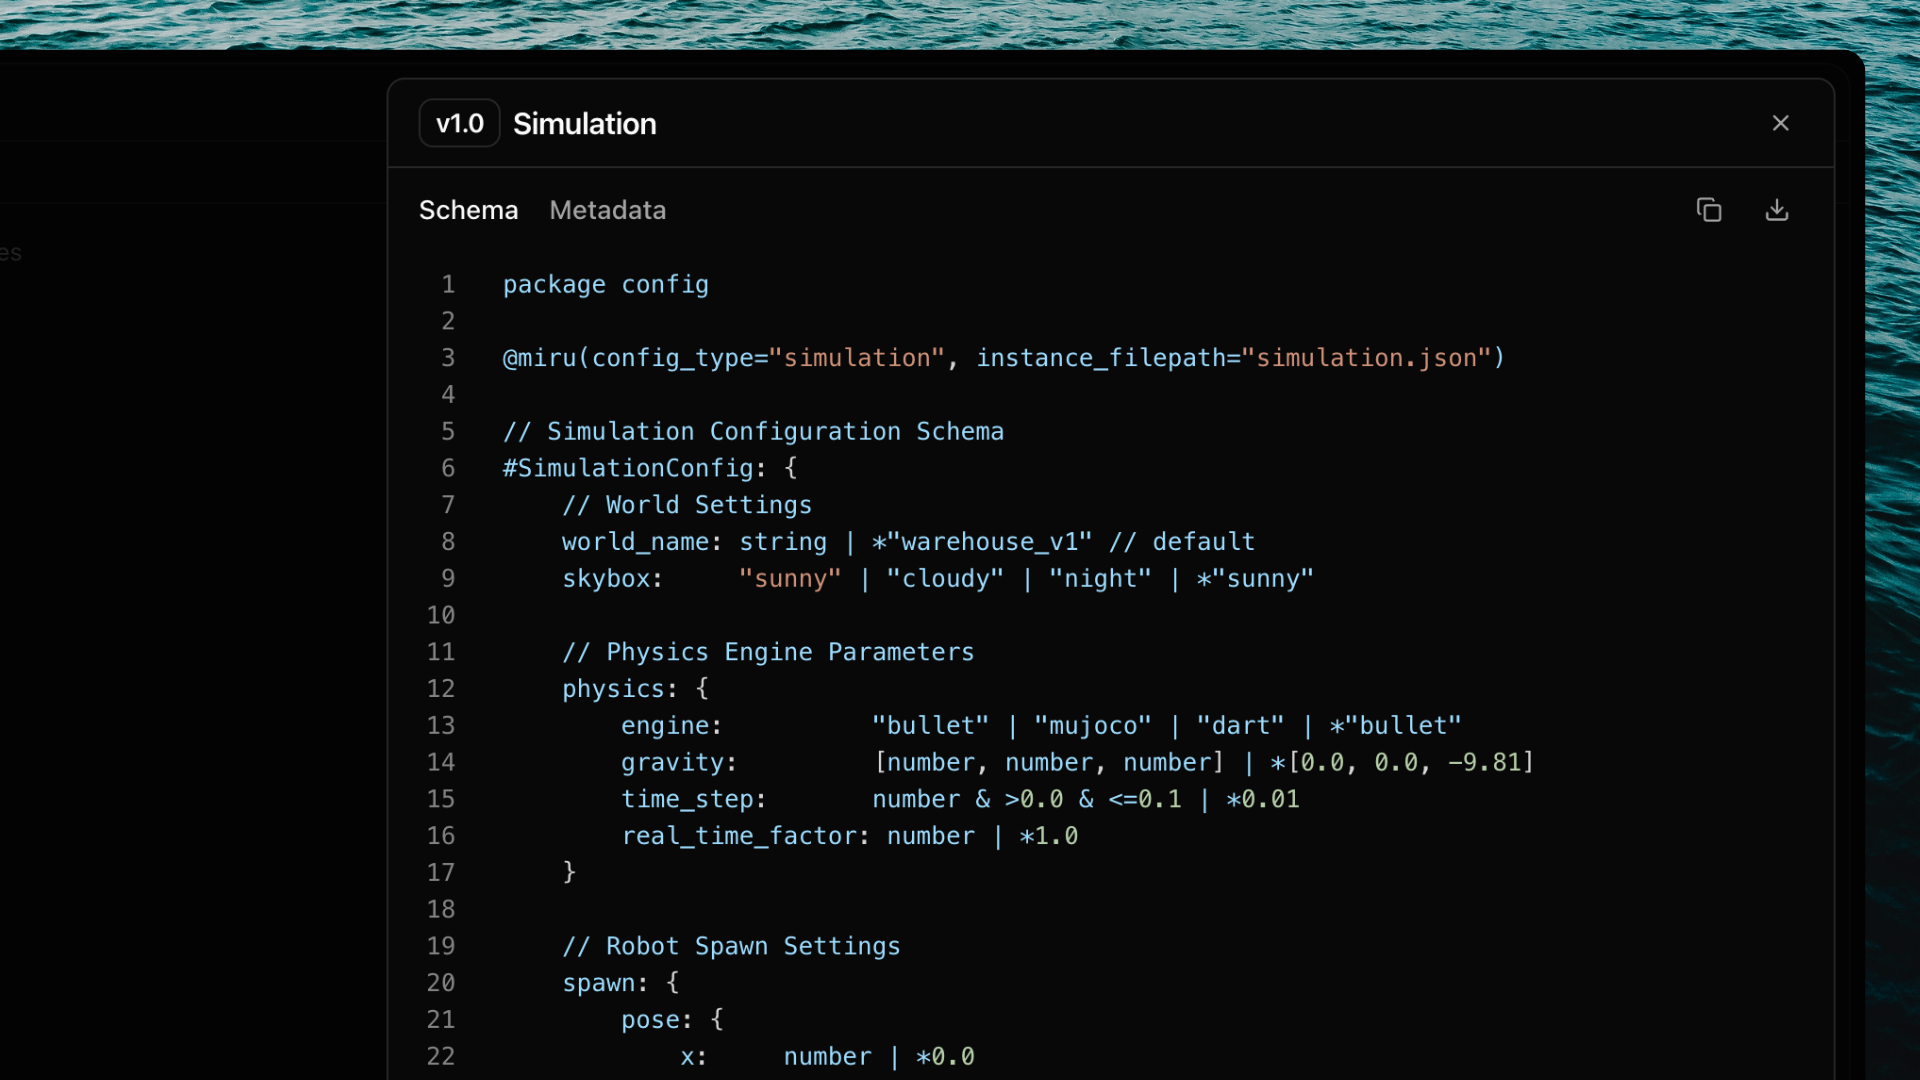 Read the full documentation »
December 4, 2025
Workspace Invitations
You can now invite team members to your workspace and manage their roles. This release also adds new workspace and profile settings.Inviting team members
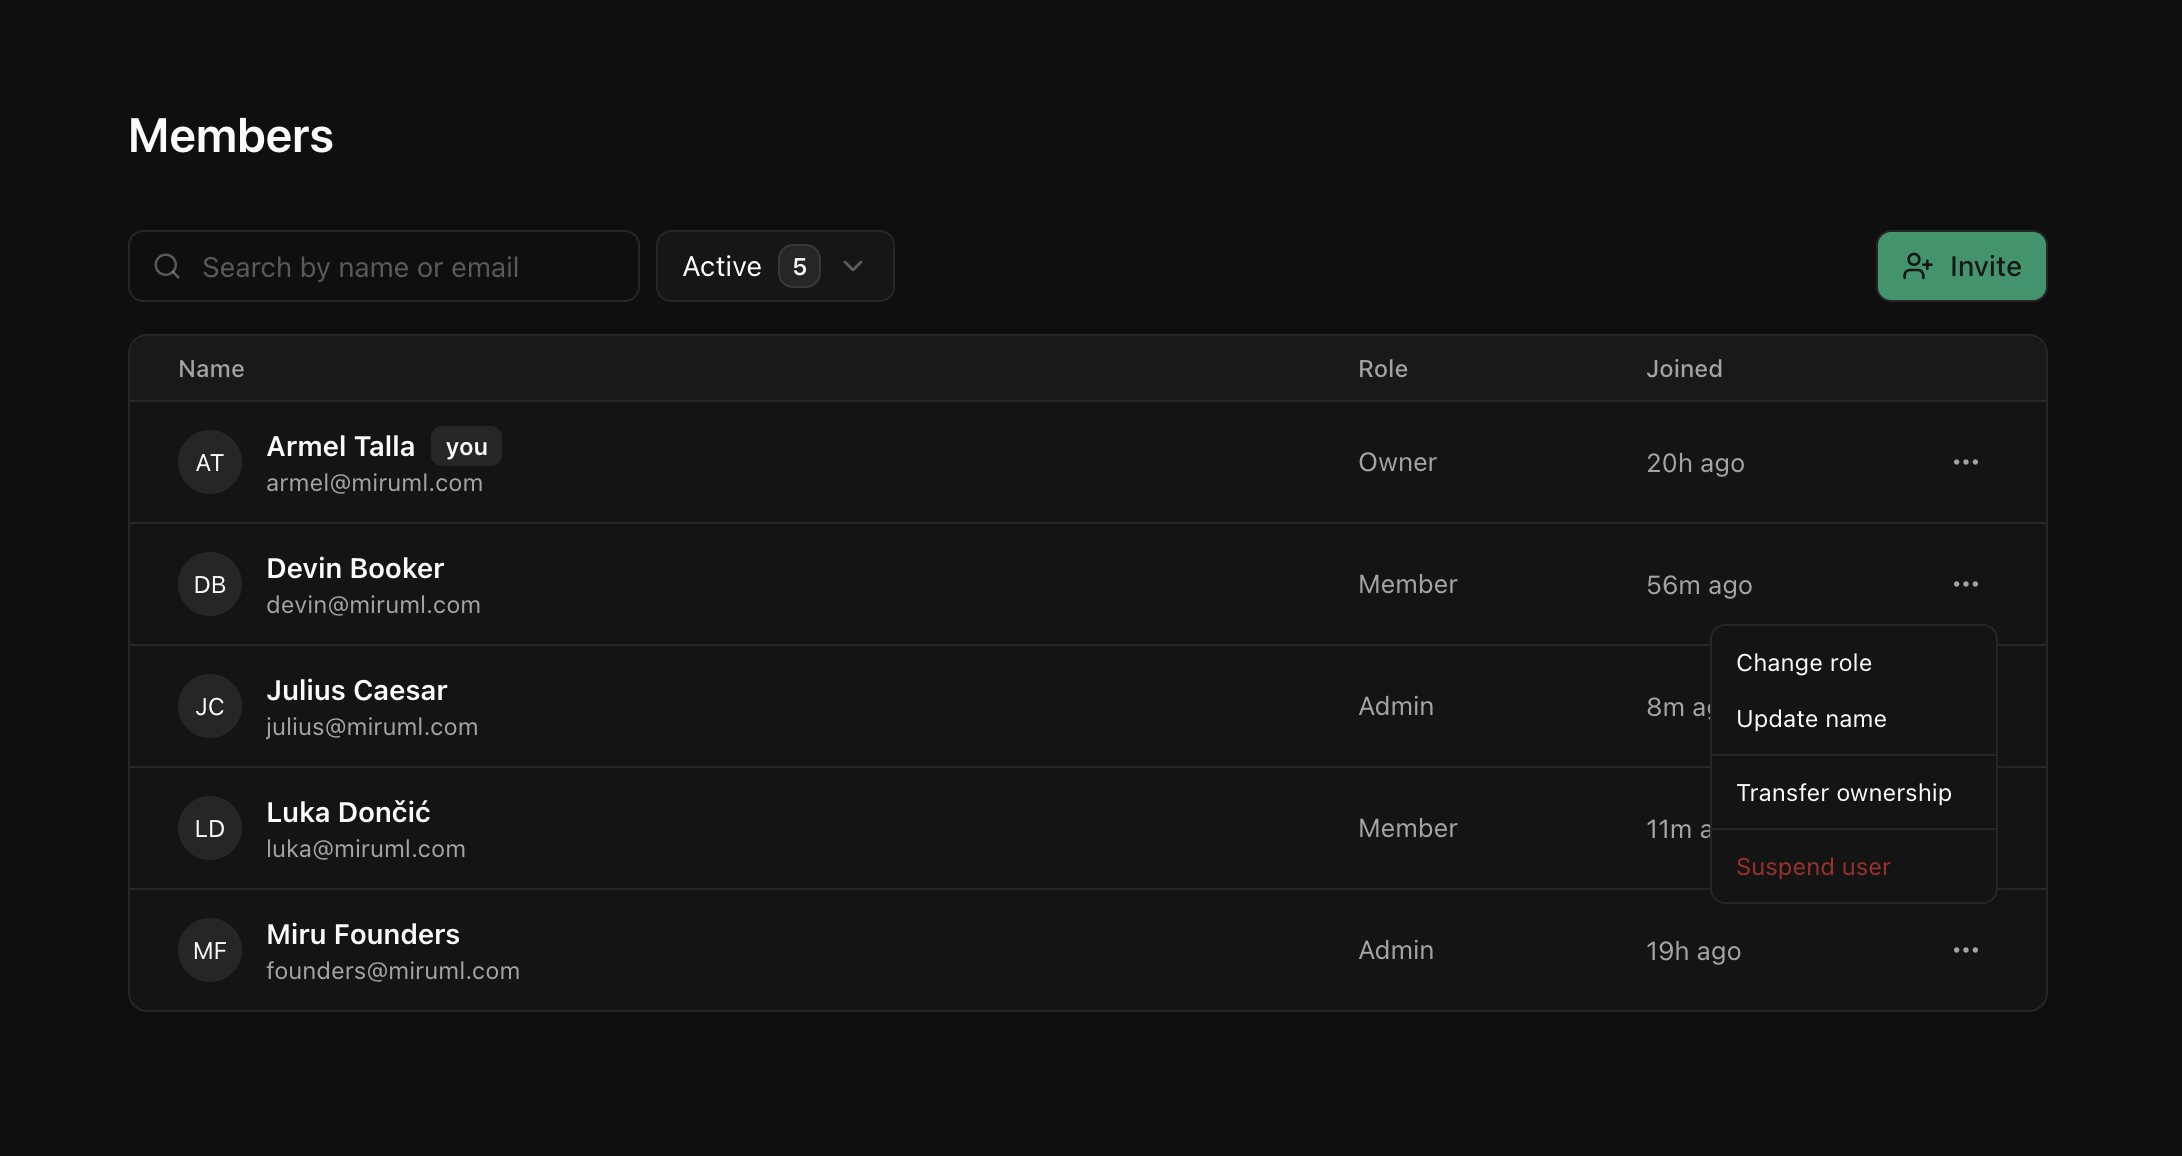
Onboard your team directly from the dashboard. Navigate to Settings > Members and click the Invite button.Once you enter their email and select a role, they will receive an email with a link to join your workspace.- New users will be guided to sign up and then prompted to accept the invitation.
- Existing users can accept the invite via the email link or their Profile settings page.
Manage roles and access
We have introduced three distinct user roles:- Owner — Full control over the workspace (limit one per workspace).
- Admin — Administrative access to manage members and workspace settings.
- Member — Application access without administrative privileges.
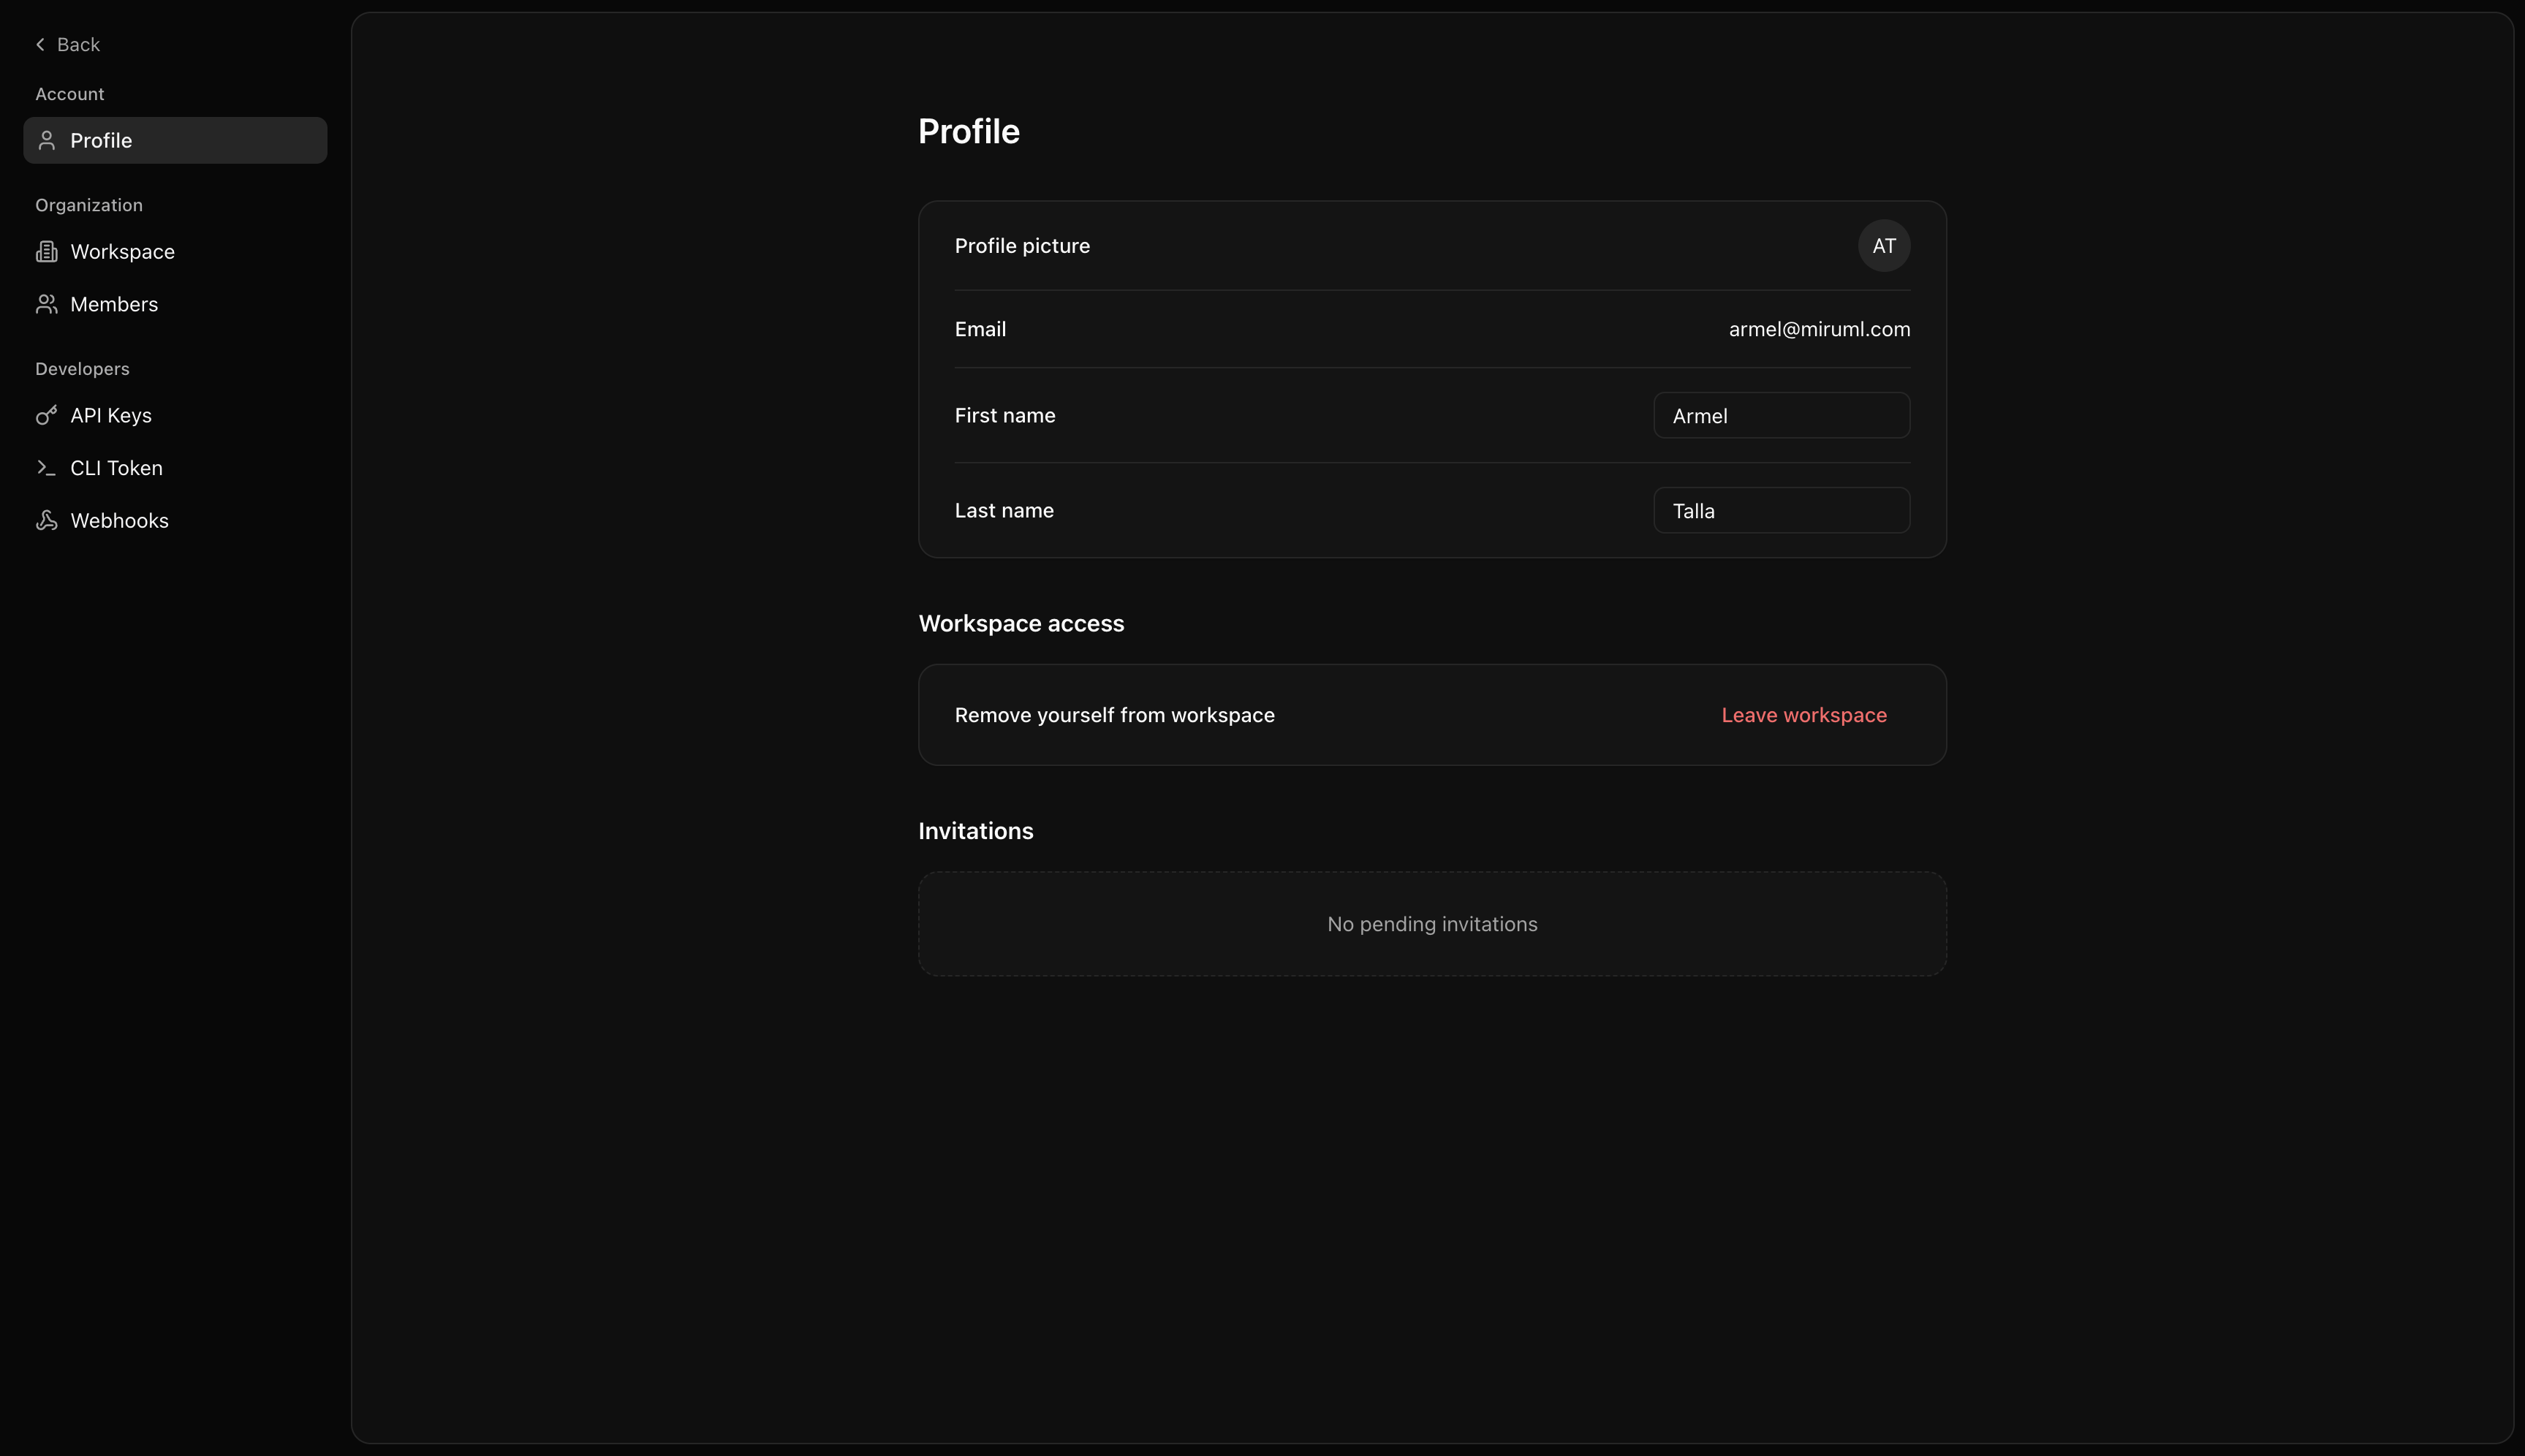
Profile and workspace settings
Manage your profile and workspace details from dedicated settings pages.- Profile — Update your name, view pending invites, or leave your workspace.
- Workspace — Admins and owners can update the workspace name.
November 10, 2025
Device Releases
You can now set and change a device’s release directly from the device page, eliminating the need to navigate to the releases page for single-device operations.Setting the initial release
After activating a device, you’ll be prompted to set its initial release before accessing the config editor. This two-step process requires:- Select a release - Choose which software version this device will run
- Deploy configurations - Create a new deployment or deploy a staged deployment