Install the Agent
To deploy a config instance, you’ll need to install the Miru Agent on your device. Before installing, double check your device’s platform is supported. The Miru Agent has been tested and verified to work on the following operating systems.- Ubuntu 20.04, 22.04, and 24.04 LTS
- NVIDIA Jetson JetPack 5.1 and JetPack 6.1
- Raspberry Pi OS (64-bit)
Create a Device
Navigate to the Devices page and click the New Device button in the top right corner.
Retrieve the Command
Click the Activate button on the device you just created.
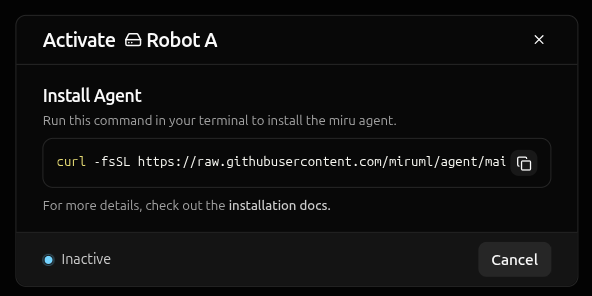
The activation token in this install command is short-lived and device-specific. Don’t share it or reuse it for other devices.
Run the Command
Open a terminal on the device where you want to install the Miru Agent and paste the installation command.Prerequisites:
curl must be installed and you need sudo privileges on the target device.curl -fsSL <installation-script-url>- downloads the installation script from the Miru Agent repository|- pipes the downloaded script to the shellenv MIRU_ACTIVATION_TOKEN=<activation-token>- sets the activation token environment variablesh- executes the script with the token
You can review the installation script source code here before running it.
- Downloads the agent - fetches the latest Miru Agent debian package
- Installs the service - installs the agent as a
systemdservice - Activates the device - registers the agent with Miru servers using the activation token
Verify the Installation
Upon successful installation, you’ll see a confirmation message in the terminal.Activating before transitioning to Online.
The transition from
Activating to Online typically takes 5-15 seconds depending on your network connection.Deploy a Config Instance
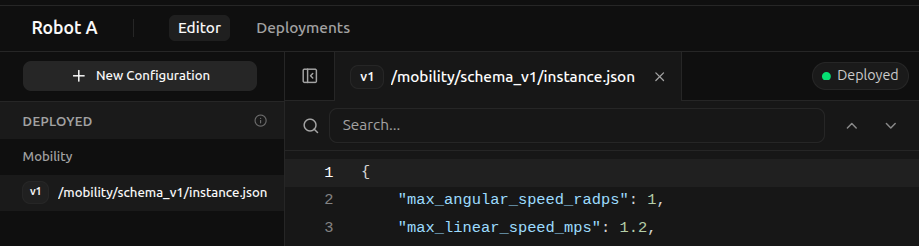
Navigate to the Devices page and click the device you want to deploy a config instance to. Click the New Configuration button in the top left.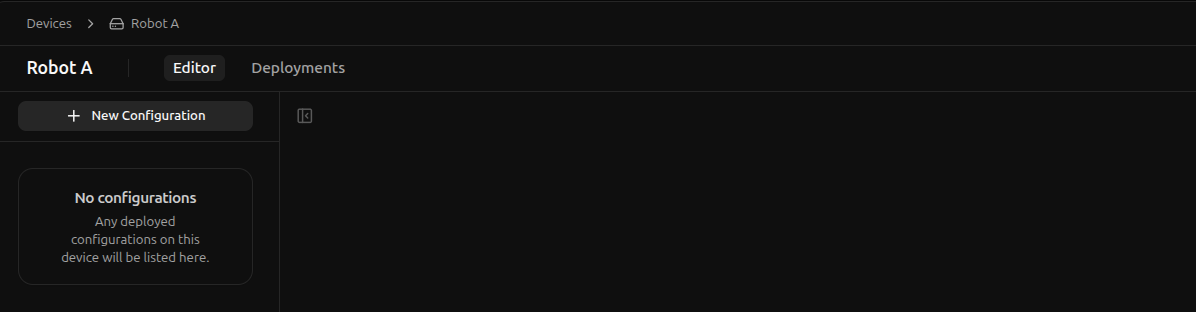
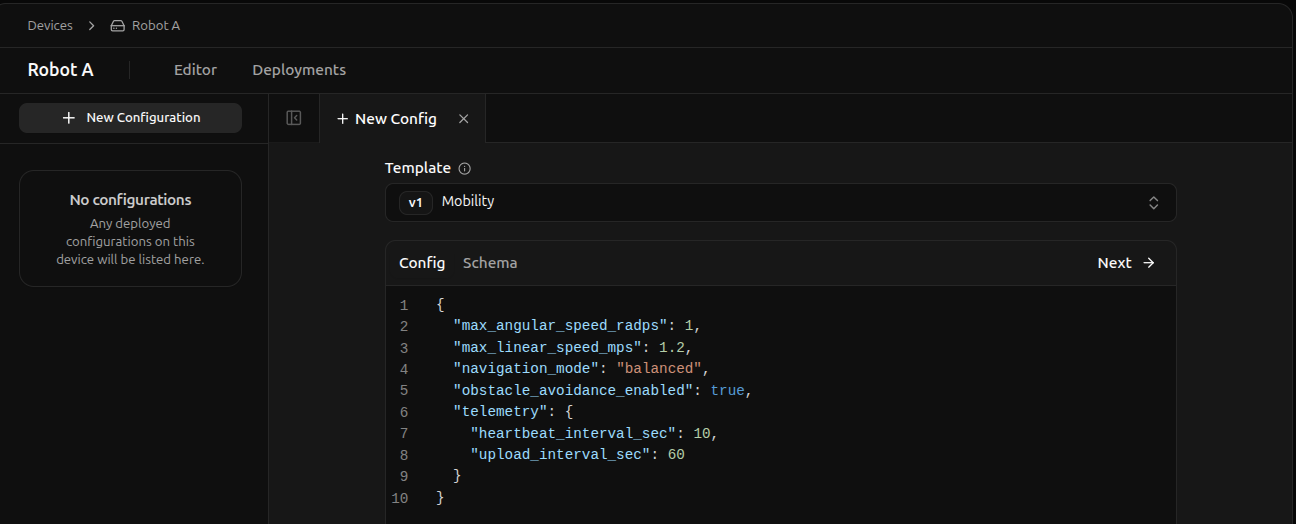
If you’re following along with the schemaless approach, you’ll find the the config instance is autopopulated with an empty json object since the schema is empty. This is expected, simply continue with any edits you’d like to make in the next step.
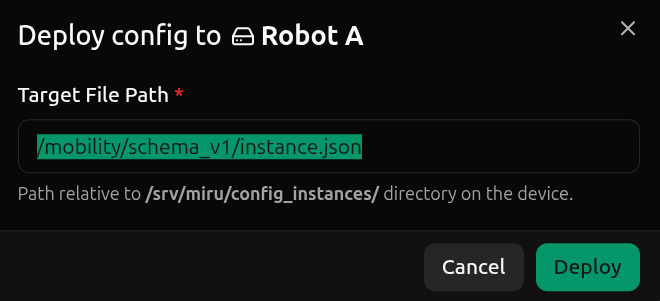
/srv/miru/config_instances/mobility/schema_v1/instance.json (the target file path).
The /srv/miru/config_instances directory is the base directory the miru agent uses for all config instances. For security reasons, this directory cannot be changed.
However, mobility/schema_v1/instance.json can be renamed to any desired path, as long as the file extension is .json.
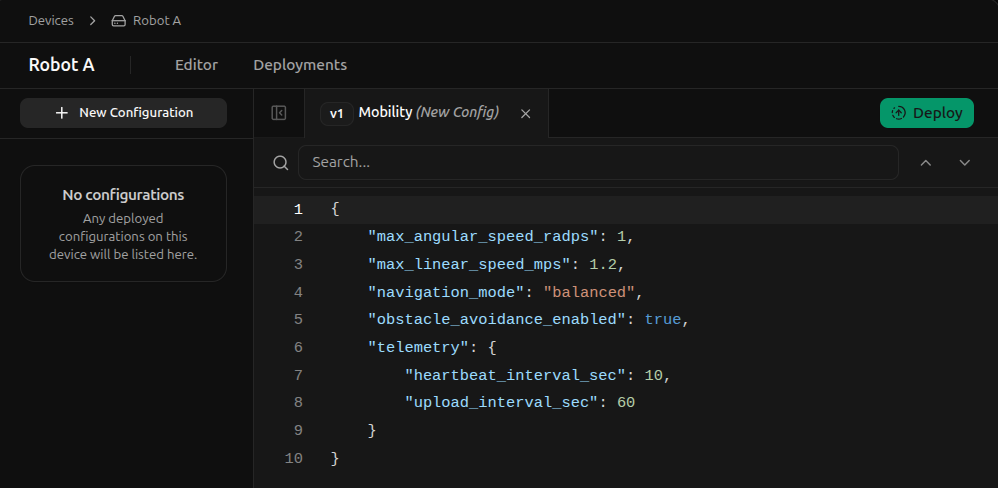
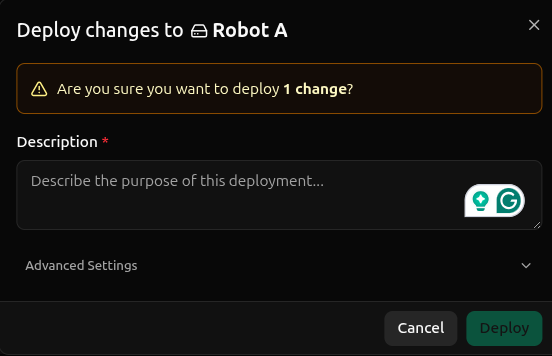
Once you are satisfied with the target file path, continue by selecting Deploy.
Queued state, awaiting the agent to recognize the new config instance desires to be deployed. If the agent is offline (poor network connection, device powered off, etc.), the config instance will remain in the Queued state until the agent is online again.
Once the agent is online, the config instance will move to the Deployed state, indicating the config instance has been successfully deployed to the target file path on the device.
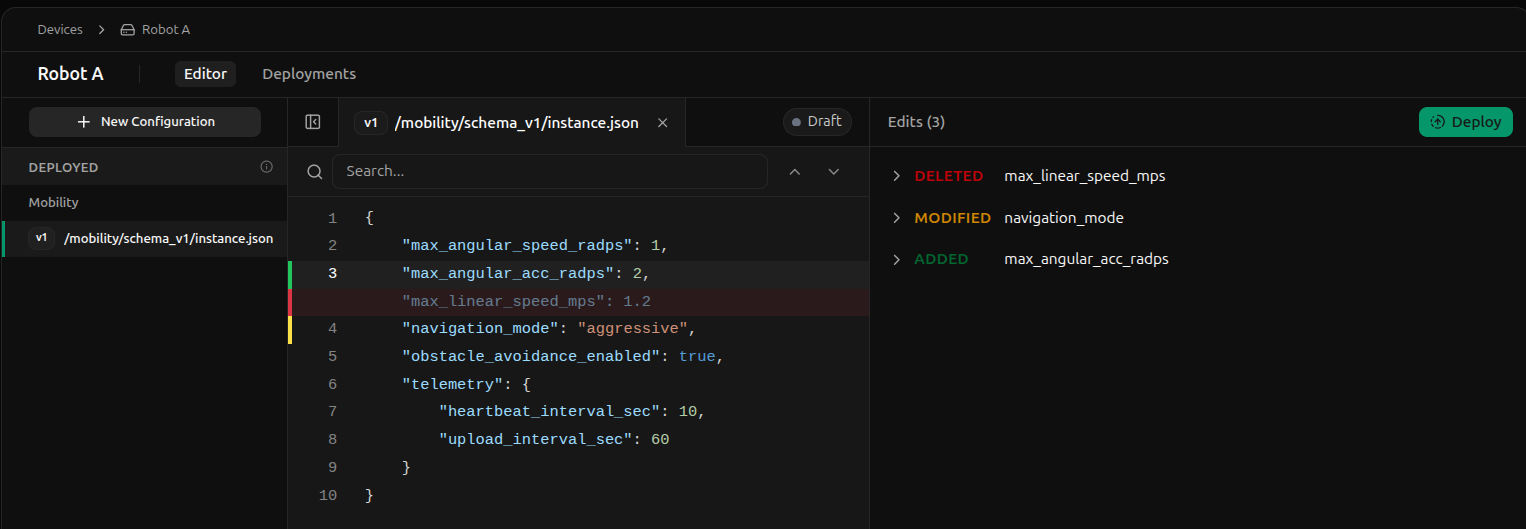
Edit a Config Instance
To edit a config instance, simply start making changes from a current config instance. As edits are made, a log on the right maintains a list of all changes, categorizing them by their type (e.g.added, deleted, modified).
Queued state, moving to the Deployed state once the agent is online and has successfully deployed the new config instance.
History
You can view a full history of config instances deployed to a device by clicking the Deployments tab in the top left, next to the Editor tab.